Your Cart is Empty
DESIGNED IN SEATTLE | MADE IN SEATTLE
DESIGNED IN SEATTLE | MADE IN SEATTLE

01 - COMPOSITE PART DESIGN
March 09, 2020 6 min read
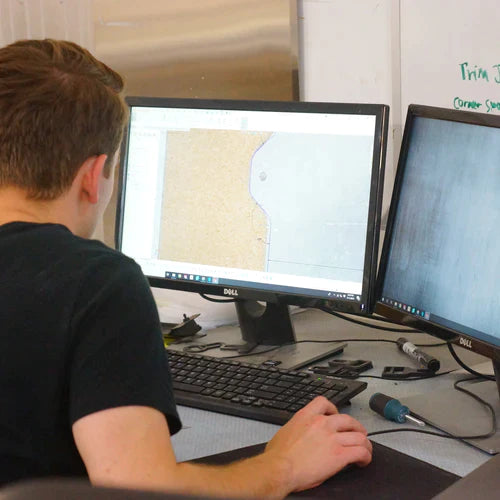
The first, and most critical, step in making something out of carbon fiber, be it a car hood, hard hat, or wallet, is to design it such that it can be made with one of the various carbon fiber manufacturing methods. In all types of design, design for manufacturing (DFM) is extremely important. In this post, we intend to run through the basics of designing a part for carbon fiber construction.
Carbon fiber is a composite, meaning that it is comprised of a reinforcement and a matrix [carbon fibers and epoxy resin]. When separate, they are both soft malleable materials. It is not until the two are mixed and cured that they form a solid shape. For carbon fiber, you must start with a mold. Molds may be referred to as tooling, forms, or plugs. It is because of this critical step that DFM must be highly considered. For a carbon fiber part to be successful it must be moldable. If you are using a CAD system to design your part, consider designing the part as a surface and then using a thicken feature to turn it into the final shape you want. In most cases, a carbon fiber part will have a uniform thickness with no internal cavities.
Choosing the Correct Manufacturing Processes
Prior to starting your design, you should decide which manufacturing process will be used. From simplest to most complex, the most common methods are wet,Infusion, or pre-preg layups. Click the links to learn more.
Wet Layup:
The wet layup method is the simplest option and can be completed in any garage. All it requires is a form, a roll of carbon fiber, some epoxy resin, and a paint brush. This method will result in the least consistent surface finish, fewer details, and a heavier part. This should only be considered for the most basic of part designs where tolerances are loose and small features are not present. A vacuum can be applied to a wet layup to achieve better details and properties without much added difficulty.
Infusion Layup:
The infusion method can also be done in a garage and requires the same equipment as a wet layup plus a vacuum pump. This method requires more experience but will result in a better part. Smaller features can be molded in, surface finish will be better, and overall weight can be controlled.
Pre-Preg Layup:
A pre-preg layup is the most complex and does require vacuum plus an oven to provide heat for curing. With the proper equipment, a pre-preg part can come out with very high detail, a nice surface finish, and very controlled and repeatable weights. Pre-preg layups would traditionally be considered too advanced for amateurs, but this is not the case! Stay tuned for our post on pre-preg layups.
With a basic understanding of the various manufacturing methods reviewed, you can determine how you will design your part. If the shape is simple, consider a wet layup, but if there are complex features and small radii, you will need vacuum pressure and should consider one of the other methods
Draft Angles
As you design your part, it is important to think of how it will interact with your mold. Most importantly, a molded carbon fiber part cannot have negative geometry, or it will get trapped in the mold. To avoid this, you may have to split your mold into multiple pieces or use die blocks. This adds significant cost and complexity. We go into further detail on this subject in our post aboutMold Design. For now, we will consider a simple part with no negative geometry. As a basic rule of thumb, all carbon fiber parts should be designed with at least 3 degrees of draft on all surfaces. This will allow the part to easily release from its mold without wearing the mold surface. In general, the deeper the draw requires an increased draft angle. With that said, you can get away with 1 degree of draft if you only have a 1” deep mold.
As a basic rule of thumb, all carbon fiber parts should be designed with at least 3 degrees of draft on all surfaces.
Molded Features and Surface Finish
With a single sided mold, only one side of your carbon fiber part will have a smooth finished surface with molded in details. This surface is called the “A-side.” The other side of the part that does not contact the mold is called the “B-side.” This basic fact drastically limits carbon fiber part design. Without making complex multi-part molds with inserts, most carbon fiber parts are limited to one finished surface. Many carbon fiber automotive components require an aesthetic finish on the top side and connection clips on the back side. The easiest way to achieve this is to post-bond on the connection points after the part is made. Continuing the example of a carbon fiber hard hat, the top surface of the hat would likely be the mold surface so that it is smooth and aesthetic. The B-side will be the interior and it will be covered in a soft foam, so the user never sees it. To achieve a finished surface with details on both sides requires multiple molds that are laid up separately and then the parts are glued together or multiple molds that interlock and the part is laid up as one.
To achieve a finished surface with details on both sides requires multiple molds.
Minimum Radii
Although your design may look better with hard edges, this adds much complexity to molding a carbon fiber part. Hard edges tend to be areas that lock in the mold or result in resin bridges. A resin bridge is an area that is rich in resin, but low in carbon fiber. This is typically because carbon fiber does not like to make a 90-degree bend and therefore pulls itself off the mold surface. A resin bridged area will often result in resin chip-outs and failed parts. To avoid this, design your parts with a minimum radius of 1/8”. Wherever possible, use even larger radii. Your parts will turn out better looking and you will have fewer failures. Tighter radii will also result in larger material build ups on the back side of your part. If your carbon fiber part has a close fit with another part or is an overlay over an existing part be careful about interference in tight corners as the laminate thickness will not be uniform.
Design your parts with a minimum radius of 1/8”.
Material Options and Appearance
The final consideration we will cover in designing for carbon fiber fabrication are the materials you choose to use. Many carbon fiber parts are designed to have a cosmetic exterior, so a twill weave is used. Twill fabric is very conformable and will bend in multiple directions in a complex mold. Plain weave is less conformable and more difficult to work with. Forged carbon fiber has become very popular as an aesthetic surface finish because it is chopped carbon fiber strands that conform to nearly any shape. Do note that with forged carbon fiber, your part will be weaker unless it is backed with continuous carbon fiber. After the first layer, most layups are backed with a cheaper carbon fiber that does not need to be aesthetic.
Additional material options to consider in your carbon fiber part are layers of fiberglass or Kevlar. Fiberglass is not as strong, but at 1/10ththe cost of carbon fiber, it can be used to bulk a part up to a desired thickness. Kevlar is great for abrasion and impact resistance and should be considered for applications that are likely to scrape against the ground, like a front splitter on a car.
Twill fabric is very conformable and will bend in multiple directions in a complex mold.
This blog post is intended to provide a basic overview of designing carbon fiber parts. The reality is that becoming a composites designer requires years of experience and potentially an engineering degree. Despite this, there is no reason you can’t start designing your own basic carbon fiber parts today! Our biggest piece of advice we can provide is the following:
Fail fast and iterate quickly!
Feel free to reach out toYour Carbon Fiber Expertswith specific questions about this process and read our other blogs in this series to learn more about fabricating strong, light, and beautiful carbon fiber parts! Common Fibers is here to help!
Subscribe
Sign up to get the latest on sales, new releases and more …