Your Cart is Empty

HOW TO MAKE A CARBON FIBER BMW E30 WIDEBODY KIT - SEMA 2018
Platform: BMW E30 318is Coup (1989 – 1991)
Design: Live to Offend X Khyzyl Saleem (@the_kyza)
Sponsors: Toyo Tires, Live to Offend, Air Lift Performance, Studio RSR, AMS Autowerks, Common Fibers
Media Coverage:www.Livetooffend.com
Idea Creation
If you’re a “car-guy” and you grew up in the 90’s you probably played your fair share of EA Game’s Need for Speed. In fact, that game might have sparked your passion for cars, after Hot-Wheels of course! In Need for Speed you had cars that you could only ever dream of owning, let alone drive at 150 MPH. Some of the cars were classics, some where supercar monsters, and others where just absurd creations only ever seen in a virtual world. Fast forward to the year 2018. Imagine now that you could drive one of those cars IRL!
Live to Offend has partnered with Khyzyl Saleem (@the_kyza), Concept Artist at EA Ghost Games, to bring them to life in the real world.
Launching at SEMA 2018 in the Toyo Tires Treadpass is their first creation: a widebody BMW E30 318is Coup with a fully custom front air dam, rear diffuser, and adjustable two-tier spoiler. The undertaking was no easy feat, consisting of over 1,000 hours of build time over a 3-month period. The process began with the rendering created by Kyza and a 3D scan of the BMW E30. Common Fibers was lucky enough to join the build as the composite fabrication team. Follow the entire build process below!
Original Renders
The incredibly realistic renders below were created by Khyzyl and are the design inspiration for the entire car. Every meticulous detail shown in the renders was transferred into the final CAD design as close as possible


Stock Car
With renders in-hand, the stock BMW E30 was selected. The car chosen was in nearly mint condition with no body damage and a clean interior. The pictures below show the car chosen and X’s for mounting points of the body kit.


3D Scan and Modeling
With the car in-hand, a 3D scan was taken of all the critical areas. This 3D scan was then used to model each component of the body kit to fit. In total, the body kit consists of the following parts:
- Front Fenders
- Side Runners
- Rear Fenders – Upper
- Rear Fenders – Lower
- Front Air Dam
- Rear Diffuser
- 6x Vent Blades
- 3 Piece Spoiler
- Front Splitter
- Side Splitters
All components can be seen modeled on the 3D scan below. 


Want to learn more about designing carbon fiber parts? Check out our post ondesigning composite parts for an introduction to our design process!
Plug Creation
After months of CAD work to get the design just right, the parts were ready to be brought to life. This is where Common Fiber stepped in. Using our 3 axis CNC, we machined high density foam plugs for each of the parts. The total run time of the CNC to make the plugs for these parts was over 100 hours, but this is significantly faster and more accurate than hand shaping each part individually. As the blocks of foam are 6 inches thick, some had to be stacked a few high to make the parts. Complexity varied from part to part. A few machined plugs are pictured below:


Each foam plug is then coated in two layers of sanding primer and hand finished and polished. This part of the process is the most labor intensive and is the most important for making an accurate mold surface.


For more information on building a plug, check out our process blogs onsplash plug fabrication,machining a foam plug, andplug finishing.
Mold Creation
With plugs polished and waxed, fiberglass female molds were made. To start, each plug was sprayed with a layer of tooling gelcoat to exactly replicate the plug surface. One hour later, a first layer of veil fiberglass is applied to the surfaced and resined in place.
This first layer is critical in solidifying the mold surface and capturing all the details of the part.
Any air pockets will result in chips in the mold surface. The fiberglassing process is always a mess but necessary in creating a durable mold. The picture below is a mold pulled fresh from it’s plug. The edges are untrimmed and raw fiberglass. Additional photos of molds follow:


You can learn more about these steps in our posts onspraying gelcoat,themold lamination process, andhow to finish your mold.
Layup Process
With molds polished and chemically released, the parts are ready to be made. At Common Fibers, our primary manufacturing method is vacuum resin infusion. We lay the carbon fiber dry into the mold with a small amount of spray adhesive to ensure a straight weave and then we pull it under vacuum. Once a perfect vacuum is achieved, resin is infused into the part and allowed to cure for 4-8 hours (depending on temperature). The following pictures demonstrate the vacuum resin infusion process:


Check out our process blog for an in depth look at the VARTM infusion process.
Part Finishing
With parts infused, the assembly process can now begin. Assembly starts with trimming the parts to their net shape. For some parts, this is all that is required to finish the part (fenders, side skirts, etc.); however other parts required more work. For example, the rear diffuser was made from 3 molds and assembled from 10 individual pieces. Each of the diffuser’s fins consisted of two halves bonded together and the diffuser itself consisted of a top and bottom side. Similarly, the rear wing assembly was comprised of 6 separate parts that were bonded together to complete the structure. The front air dam pictured below was made from 3 molds and assembled as one. Carbon fiber was used to permanently attach the parts together.


The final step in creating the body kit was the body work. In the case of many of the parts, they were going to be painted and did not need to be cosmetically finished. These parts were simply sanded, filled, and faired to create a smooth, paint ready finish. Parts that were cosmetic were wet sanded and prepped for clear coat. The clear coating process of carbon fiber typically takes 2-4 coats to fill the micro porosity on the surface. In between each coat, the surface must be flat block wet-sanded to a smooth finish.


The following pictures are of the parts before assembly on the car. The rear diffuser, splitters, center wing, and gurney flap were the only parts finished cosmetically. The rest were sanded and prepped for paint.


You can learn more about the intricacies of the finishing process in our posts ontrimming carbon fiber,how to spray clear coat andbuffing and polishing best practices.
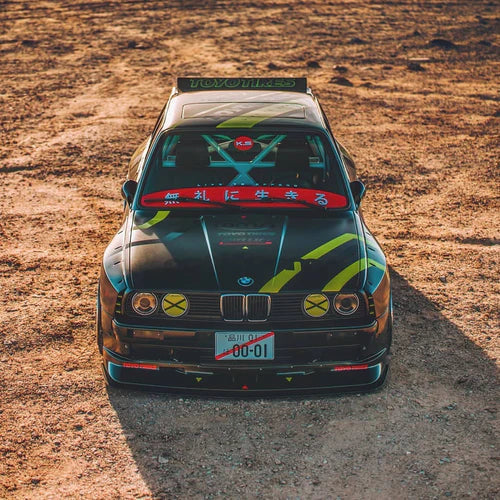
Final Build
The final build can be seen this week at SEMA in the Toyo Tires Treadpass between the Central and South Halls. Below are a few pictures in case you miss it! Follow us on Instagram @commonfibers or @lto_livetooffend or @the_kyza @lto_eric for more info on this build!


