Your Cart is Empty
DESIGNED IN SEATTLE | MADE IN SEATTLE
DESIGNED IN SEATTLE | MADE IN SEATTLE

November 30, 2018 3 min read
Platform: Ford F150
Design: Individual
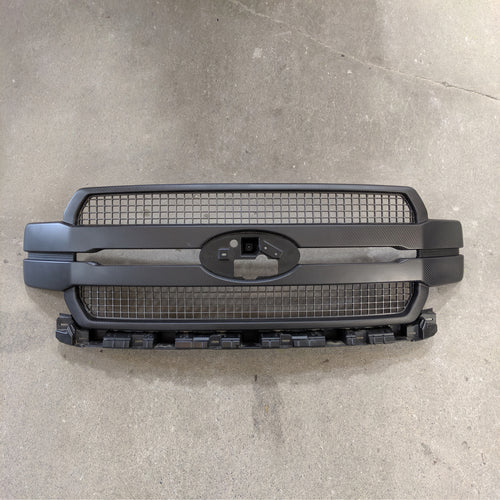
This project was brought to our custom composites manufacturing shop in Seattle, WA by an individual who wanted to upgrade key exterior trim pieces on his Ford F150. The result was an understated, ruggedized carbon look that perfectly fit the design of the truck.
Our customer wanted to go all out on this project. He brought us the front grill, tailgate applique, mirror covers, rear trim kit... even the F150 badges!
Materials: Melamine Board, Duratec Sanding Primer
Time Required: 20hrs


All of the parts were splash molded. Before attaching them to the melamine and claying them up, we needed to remove all of the OEM mounting hardware. We planned to use it to remount the carbon fiber replicas.
Whenever possible, splash mold pars should be mounted on a flat, stiff surface to provide flange and maintain the correct shape. The front grill had too much of a curve to fill with clay so we opted to use Masonite, a more flexible material, to match the shape and then build structure behind it to provide the rigidity.
Looking for more info on building a plug? Check out our process blogs onsplash plug fabrication,machining a foam plug, andplug finishing.
Materials: Tooling Gelcoat, Fiberglass Chopped Strand Mat, Polyester Tooling Resin
Time Required: 20hrs


The mold lamination process went smoothly for this project! It is worth noting that the OEM parts had a fair amount of texture that our customer wanted to maintain in the carbon replicas. Typically we would sand and polish the surface of the plug for a glossy mold finish, but in this case we left the texture and made sure to apply a couple extra layers of wax before spraying gelcoat. We were able to achieve incredible detail on the tailgate applique and badge lettering, in great part due to the fiberglass slurry technique we use.
You can also learn more about these steps in our posts onspraying gelcoat,themold lamination process, andhow to finish your mold.
Materials:6K Carbon Fiber Fabric, Epoxy Resin
Time Required: 10hrs


This project challenged our lay-up team's skills at cosmetic carbon! We were unsure how the 6K twill weave would turn out on the badge - it is extremely challenging to maintain the twill pattern in a small mold with many features. To address this (Did we end up lasering carbon?). Working the carbon from the center of the part out is critical - you can check out our blog posts for an in depth look at theVARTM infusion process and our upcoming troubleshooting post on laying up cosmetic parts.
Materials: High Build Clear Coat Primer, Clear Coat, 3M Buffing and Polishing Compounds, Boss Perfecting Foam Pads
The parts were lightly sanded to remove some of the texture, then sprayed with a matte clear coat. You can learn more about the intricacies of the finishing process in our posts ontrimming carbon fiber,how to spray clear coatandbuffing and polishing best practices.
The pictures below show some of the original parts next to their carbon replicas. The OEM plastic hardware was painstakingly retrofitted into the carbon parts using a professional grade urethane adhesive. Happily, the new parts fit perfectly on the truck. Great success!


Sign up to get the latest on sales, new releases and more …