Your Cart is Empty
DESIGNED IN SEATTLE | MADE IN SEATTLE
DESIGNED IN SEATTLE | MADE IN SEATTLE

07 - MOLD LAMINATION
October 07, 2019 3 min read
Applying fiberglass and resin backing to tooling gelcoat, or 'mold lamination', is the final step in creating a fiberglass mold. In this post we will cover best practices for applying the fiberglass and stiffening the mold.
Tools
- Chop Saw
- Measuring Tape
- Scissors
Materials
- Disposable Paint Brush
- Cheap Paint Roller
- Fiberglass Chopped Strand Mat
- Fiberglass String
- Polyester Tooling Resin & Catalyst
- Disposable Graduated Cups
- Stir Sticks
- Plastic Sheeting
- 2' x 4' Studs
- Disposable Gloves
Safety
- Good Lighting and Properly Vented Room
- Tyvek Suit
- Respirator
Preparation
After the gelcoat has cured to the touch and will no longer transfer color to your finger you are ready to proceed. Gelcoat won't cure in air alone, as it is designed to remain tacky until laminated with the fiberglass and resin.
Before you begin, put on a tyvek suit and place a sheet of plastic under the workspace. Fiberglassing is a very messy process.
Next,prepare the fiberglass layers. You'll want to be able to cover the entire surface of the mold with 2-3 very thin layers, then 4-6 thick layers. Thefiberglass chopped strand mat can be peeled into these different sizes. Don't try to cover the whole mold in single sheets - take the different features into consideration and cut pieces that will naturally lay into them.
Pour the total amount of resin you'll need into graduated cups. Each cup should have no more than 500-700mL of resin so that it doesn't start to cure, or 'kick', before you've painted it on the mold. You'll catalyze the each cup individually, as you need it.
Finally, lay the fiberglass string into any tight radii to ensure that the edges are backed. If the gelcoat isn't sticky enough to hold the string in place, mix up a small amount of resin, paint the surface then stick it.
Process
Mix up your fist batch of resin and catalyst. The percentage of catalyst used will vary depending on the ambient temperature of the room, and for subsequent layers, how hot the mold is getting. For more information check back later for our nifty catalyzing table!
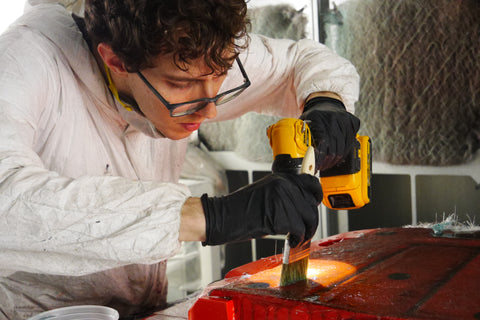
Apply the thinnest possible layer of fiberglass chopped strand mat to the entire gelcoated surface. Mentally note direction and order in which you're laying things down - repeat this pattern each time so that it is easier to remember which layer you're working on.
It is critical that there are NO air pockets under the first layer of fiberglass. Using the roller, all air should be removed so that the surface of the mold looks transparent. Any white air pockets need to be rolled out - a flashlight can be helpful for finding them. If you're unable to roll the air out, razor can also be used to cut the mat. If the mold has particularly intricate features, apply 1-2 more thin layers of fiberglass and resin, then stop and let it cure overnight before beginning with the bulking layers.
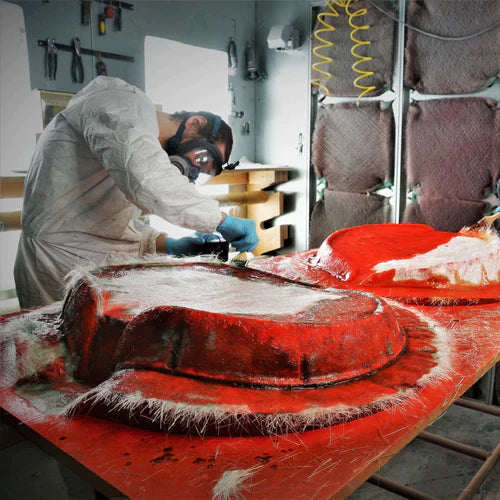
Once the initial layers are down, it is time to bulk up the mold and drape additional fiberglass over the edges to make a solid 4-6 inch flange.The final mold should be between 1/8" - 1/4" thick. Begin using the full sheets that were kitted earlier. The thicker the fiberglass, the easier it is to have dry spots or bubbles forming so be vigilant about thoroughly wetting out each piece. The white fiberglass should turn completely transparent when wet. There will be a fair amount of dry fiberglass fringing the edges of the mold - don't try to wet it out. It will be trimmed off in the next step.
After about 5 layers of fiberglass, stiffening can be added to the mold to reduce the amount of fiberglass that must be used. Cut the 2'x4' studs to form a box under the flange. Add struts if the mold is large or if if the part has a particularly large flat surface area.An additional 5 layers should be added on top and underneath the studs to get to approximately the correct thickness.
Let the mold cure overnight before moving on to demolding or 'popping' the plug. You can learn more about previous and next steps in the mold making process in our posts onspraying gelcoat andhow to finish your mold.
Subscribe
Sign up to get the latest on sales, new releases and more …


