Your Cart is Empty

08 - MOLD FINISHING
Once you have finished laminating your fiberglass mold, there are a few steps to complete before you can make parts. In this post we’ll walk you through how to remove the plug from the mold and how to properly prepare it for laying up your first part.
Tools
- Putty Knife
- Plastic Wedges
- Soft Mallet
Materials
- Wax and Microfiber Cloth or Chemical Release System and Rags
- Bondo
- Sandpaper, 180-1500 Grit
- Gloves
DEMOLDING
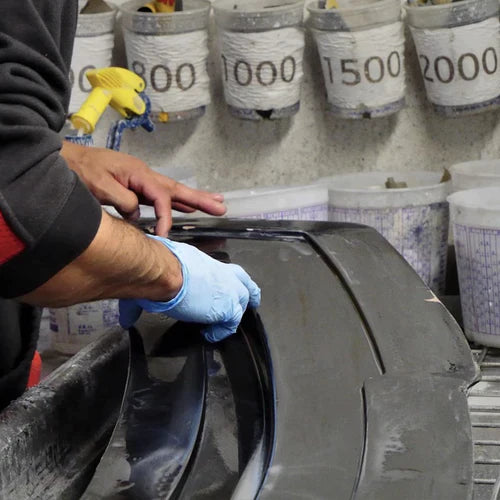
Use a putty knife to begin separating the mold from the plug. Once you’ve created a small gap, use a mallet to drive soft plastic wedges between the part and plug.
Work the wedges around the perimeter of the plug. It is possible to bend or crack the mold as you do this, so take care not to apply too much force on any one part of the flange. Also be mindful of where you’re driving the wedges. You don’t want to dent or scratch the mold surface as you remove it.

Often you will hear a snap or crack as the mold releases.
Once the plug is free from the mold it is time to clean the mold surface. If you used PVA as your release agent you can either peel it off or dissolve it with water. If you used any clay to modify plug features, you’ll need to use very hot water and a sponge to scrub it off. Finish wiping the mold down with soapy water.
SURFACE FINISHING
Next, evaluate the mold. Are there any cracks, holes, or other defects? Use your fingers to apply pressure along any detailed features and tight radii to see if you can break through the gelcoat. What does the surface texture look like? The mold finish will be perfectly transferred to your part, so think about what kind of finish you want your part to have.
If the mold has a defect, use bondo to fill it then sand to the desired shape. If the bondo is patching a complex feature, you may need to repeat this step a couple of times to build the correct shape. Once you’re happy with the shape of the mold, sand the entire surface with progressively finer grit sandpaper until the desired surface finish is achieved. Do not sand through the gelcoat unless necessary. You’ll be able to see the fiberglass backing through the gelcoat as it gets thinner. If this occurs stop sanding immediately. We typically sand to 1500, then buff and polish for a high-gloss mold surface. You can save some time on this step by foregoing grits above 800 on the flange.

The final step is to clean the mold with soap and water and begin the release process. You can use a wax paste like TR Wax or chemical release agent like the Chemlease system. Once this is completed you may begin laying up your first part.
RELEASE
A wax release agent is applied with a sponge (usually provided in the wax tin) and a clean rag. Wear gloves to avoid contaminating the surface of the mold with skin oils. Load the sponge with a generous amount of wax then wipe it on the mold, systematically working your way from one side to the other. Let the wax sit for 5 minutes then buff it off with the clean rag. Wait 30 minutes then repeat the process. New molds typically require five to six layers of wax to properly prepare the surface the first part. One to two layers of wax should be applied to the mold between each lamination.
Alternatively, you can use a chemical release agent, like the three-stage ChemLease system. As with the wax process, you’ll want to wear gloves. Set aside a one wet and one dry rag for each of the three stages. If two people are performing process, have one apply with a wet rag and the other follow behind with the dry rag at the specified interval. If you are performing the process alone, divide the surface into sections roughly two square feet in size. Apply the solution and then wipe off completely before moving to the next section.
When applying the third and final ‘Release’ stage to a complex mold, consider having two or three different people apply the release agent. This will reduce the chances that any awkward or hard to reach parts of the mold will be missed, since each person will use a slightly different pattern as the wipe on the material. Avoid touching the mold with bare hands after it is fully released. You can expect to pull 5 parts off the mold before you need to reapply the ‘Release’ stage. The full mold should go through the full ChemLease process every 15 parts.