Your Cart is Empty
DESIGNED IN SEATTLE | MADE IN SEATTLE
DESIGNED IN SEATTLE | MADE IN SEATTLE

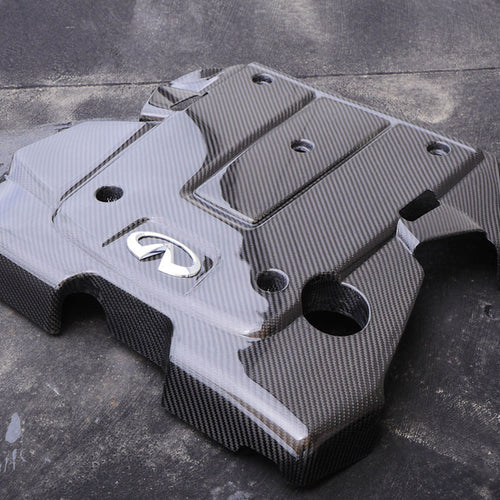
HOW TO MAKE A CARBON FIBER INFINITI G37 ENGINE COVER
June 10, 2020 3 min read
Platform: Infiniti G37 Engine Cover
Design: Individual/Common Fibers Group Buy
This project was brought to our custom composites manufacturing shop in Seattle, WA by a local G37owner that regularly attends shows and features his car on Instagram.
IDEA CREATION
This project was inspired by the rest of our customer's highly customized G37, has electric blue accent pieces throughout the car. Requirements for the cover included a blue carbon fiber and Kevlar weave and several modifications to the original shape to accommodate other after market components in the engine bay.

Plug Creation
Materials: 15lb Tooling Foam, Duratec Sanding Primer
Time Required: 3hrs

This project is perfect example of a well-executed splash plug. We removed the emblem to install on the final part, clayed in features that were too fine and filled radii that were smaller than 1/4". Special modifications to the shape were also added to accommodate our customer's custom components. You can learn more about plug making best practices by reading our process blogs onsplash plug fabrication,machining a foam plug,andplug finishing.
Mold Creation
Materials: Tooling Gelcoat, Fiberglass Chopped Strand Mat, Polyester Tooling Resin
Time Required: 5hrs

Some of the details from the original part were necessary, however. To address them, we used a combination of 'toeing' or laying fiberglass string, in the small features to make sure there was material backing the gelcoat. We also used our fiberglass slurry technique to fill what would eventually become the fixture points of the cover. You can learn more about our mold lamination in our posts onspraying gelcoat,themold lamination process, andhow to finish your mold. Keep an eye out for a post on our slurry technique as well!
Layup Process
Materials:6K Carbon Fiber Fabric, Epoxy Resin
Time Required: 2hrs

Pictured above is the first layer of cosmetic twill, after it has been laid into the mold. Our customer didn't want seam lines on the final part, which meant we needed to use a single piece of carbon fiber fabric. It would have been impossible to maintain the weave pattern in a mold with abrupt features like this one, so we templated thesize and placement of the cylinders, then used our laser to cut the holes. The strategy worked perfectly, the final part didn't have any significant weave distortion.


Two lay-ups were done, one with our regular 6K twill carbon fiber fabric, and one with the blue twill carbon and kevlar fabric requested by our customer. The kevlar is significantly stiffer than the carbon does not conform well. This resulted in the yellow 'bridging', an area on the surface that filled with resin because the carbon wasn't touching the surface of the mold.
It's also worth noting that this infusion used a high-temperature epoxy resin system that is designed to withstand the heat in the engine bay. Check out our process blog post for an in depth look atVARTM infusions. We'll also be posting trouble shooting guides for doing the first cosmetic layer in a mold and how to check for bridging in the near future.
Part Finishing
Materials: High Build Clear Coat Primer, Clear Coat, 3M Buffing and Polishing Compounds, Boss Perfecting Foam Pads
Time Required: 4hrs


The cover was carefully trimmed by had, to our customer's specifications. It was then finished with a gloss clear coat and buffed and polished to a sheen. The final step was to reinstall the emblem - there is an example on black carbon part in the final build section below. You can learn more about the intricacies of the finishing process in our posts ontrimming carbon fiber,how to spray clear coatandbuffing and polishing best practices.
Final Build


Subscribe
Sign up to get the latest on sales, new releases and more …


